Inspection and Testing
In order to meet the needs of customers and to ensure high quality products, Tianjin Anson International Co., Ltd(TICO) provides a wide range of inspection oilfield services. Our skilled technicians use a set of standards and advanced pipeline inspection to test and validate OCTG products completely.
OCTG tubing and casing inspection services
Ultrasonic Testing(UT)
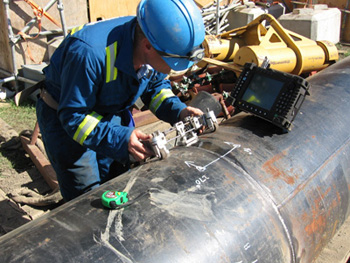
Ultrasonic testing, known as UT, enjoyed wide application in the flaw detection and quality control of metallurgy and manufacturing industry. It is able to precisely detect, inspect and diagnose the flaws in the material.
In an ultrasonic test, the ultrasonic transducer connected to a diagnostic machine is put on the pipeline to be inspected. High frequency sound waves can directly travel through the metallic material. If the sound waves hit a defect, normally with a different acoustic obstruction, some of the waves will reflect back to the sending unit and inspectors can see the results in the form of signals on the visual display. By analyzing the reflection, inspectors can locate and test the crack or other hidden defects.
Ultrasonic inspection has the advantages of detecting the thickness of large, high sensitivity, fast speed, low cost, harmless to the human body and can locate and quantify the defects. Ultrasonic flaw detection of defects is not intuitively shown and it has high technical difficulty of detection. Easily influenced by subjective and objective factors, the testing results is not easy to preserve. Generally speaking, ultrasonic inspection has its limitations.
Eddy Current Testing(ET)
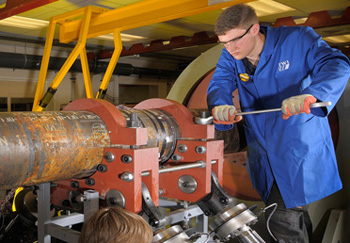
The coil with the alternating current is arranged in metal plate, at this time the coil and its vicinity will produce an alternating magnetic field, so that the test piece in a vortex induced alternating current, called the eddy current.
Measuring the magnetic field variation induced by eddy current with a probe coil, can be inferred from the test size and phase change in eddy current. And then get the information about the changes of electrical conductivity, defects, material conditions and other physical quantity or defects. But because the eddy current is the alternating current, which has the skin effect, the detected information can only reflect the condition of the specimen surface or near surface.
The eddy current does not need to be directly contacted with the measured object and can be carried out at high speed, easy to realize automation. But it is not suitable for complex shape parts, and can only detect the surface defects of conductive materials. The test results are also susceptible to the interference of the material itself and other factors.
Radiographic Testing(RT)
When an object is irradiated by a beam of uniform intensity, if there are defects or structures in the object, it will change the attenuation of the beam, which makes the transmission intensity of different parts is different. In this way, it can be used to detect the defect and material distribution in the object, so as to complete the inspection of the object. For the commonly used industrial radiographic testing, X - ray and gamma ray tests are generally used.
Penetrant Testing(PT)
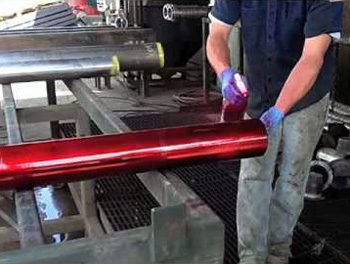
The surface of workpiece is coated with a fluorescent dye or dye of the penetrating agent, under the capillary action, after a certain period of time, the penetrating agent can penetrate the surface opening defect. Removal of excess of the working surface of the penetrating agent, after drying, apply on the surface of the work piece surface adsorption media - imaging agent; Under the capillary action, the imaging agent will attract the defects of the penetrating agent, that is, the osmotic agent back to the imaging. Under certain light source (black or white), the defect of the osmotic agent traces is shown, to detect defects on the morphology and distribution of the state.
The basic steps of penetration testing
pretreatment→penetration→cleaning→imaging→observation records and evaluation→afterprocessing
Magnetic Particle Testing(MT)
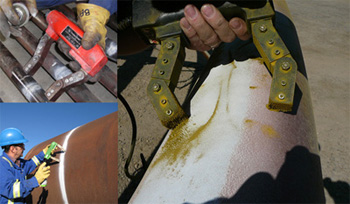
After ferromagnetic material workpiece magnetized, due to the existence of discontinuities, the lines on the surface of the workpiece have local distortion resulting from leakage magnetic field. Magnetic particles, which are applied on the surface of the workpiece, are adsorbed by magnetic field. A visible magnetic mark is formed under appropriate illumination, which shows the position, size, shape and severity of discontinuity.
Magnetic particle testing can only be used for detection of ferromagnetic material surface, due to the discontinuous magnetic mark heap to be detected on the surface, so it can intuitively shows discontinuous shape, position and size, and can be roughly determined its nature.
The sensitivity of magnetic particle testing can be detected with width of 0.1μm. Comprehensive use of a variety of magnetic methods, magnetic particle testing is almost not affected by the size and geometry of the workpiece, it can detect the defects in all directions of the workpiece.
OCTG line pipe inspection services
Seamless steel tube geometry inspection
Seamless steel pipe wall thickness inspection Micrometer is the main tool that is adopted. When you check, left hand holds the micrometer stand, with right hand rotation induced wheel, and the wire rod should be coincident with the diameter of the measuring point. Once found that the wall thickness is not qualified, it should be marked in time.
Outside diameter, ellipse of seamless steel pipe inspection. Calipers, vernier caliper should be taken. The caliper should be perpendicular to the axis of the steel pipe in checking, measuring the maximum and the minimum point when the pipe rotated slowly. Founding the outer diameter of large or small, you should mark it in time.
Seamless steel tube length inspection. The steel tape can be measured directly by metallic tape.
End profile inspection. At two ends of the steel tube should be cut into specified angle and remove burrs. The method of inspection adopts angle square and general use tube end groove clamp in the field.
Welded pipe inspection
Crude material inspection of welded pipe
The quality of raw materials is the key to ensure the quality of welded pipe, therefore, all the raw materials used in the factory must be tested before into the factory. Chemical composition and tensile test should also be carried out and it can be put into production normally after passing the test. Once the problem is discovered, the treatment should be solved in time.
Geometric dimension inspection of welded pipe material
- The length of the strip is generally more than >150m
- Width allowable deviation: less than 100m, allowable width deviation is not more than+0.5mm; greater than 100m, allowable width deviation is not more than±0.5mm;
- The tube thickness deviation: size -1.8-2.5 allow deviation ± 0.16-0.18mm; dimensions -2.75-3.0 allow deviation±0.16-0.20mm; dimensions -3.2-3.8 allow deviation±0.2-0.25mm
Hydrostatic Testing
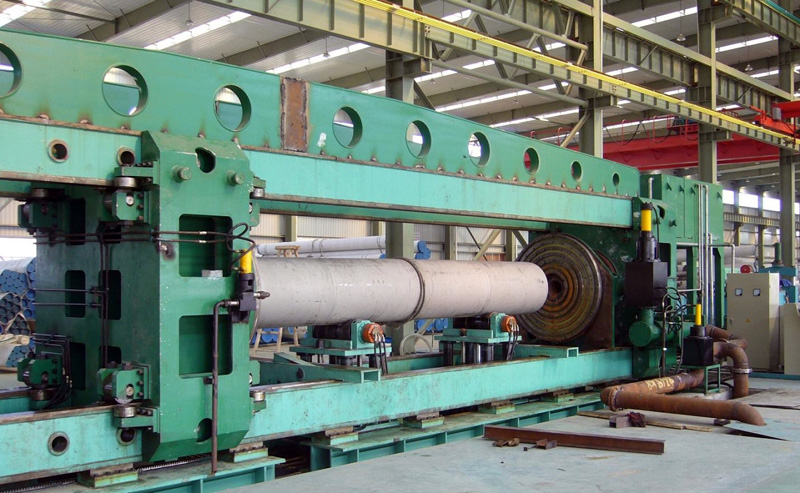
Hydrostatic test is an inspection method to reduce the risk of flaws in the pipe that might threaten its ability to withstand the maximum operating pressure. Hydrostatic testing inspects the integrity of pipelines by filling in the pipe with a non-compressible liquid (often water, dyed) to increase the pressure level above the normal pressure to see if there is any defect exists. It can either carried out on pipes prior to being put into service or on existing pipes that are already in service.
In order to carry out hydrostatic testing, the following rules should be strictly stuck to:
- Testing with air is dangerous and not recommended. Therefore, the first step is to release the air in the pipe.
- In the testing process, all the valves and vents should be shut to observe whether there is pressure loss.
- Hydrostatic test should be performed after all the hot work has been done to the pipe, including welding, heat treatment, etc.

